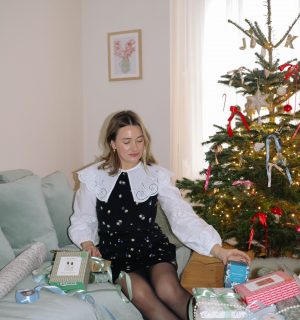
I’ve lost count of how many times I’ve been asked for advice on how to get brighter photos, I think it comes up in every Q&A I do! I love bright, clean photography – whether it be on Instagram or my blog, and so I’ve put together a little guide on how to achieve the look…
Find A Bright, Light Space
This is an obvious one, but it’s crucial in getting the best photos. Find a place in your home to take those dreamy flatlays – I recommend going for a windowsill or underneath a window for best results. You want maximum natural light to enhance your snap!
I recommend trying out various areas – does your bedroom offer good access to neutral, natural light? Does your kitchen have a big windowsill you can set up flatlays on? Think outside the box!
This also works for photography when you’re out and about too. If you want to up your Insta foodie game, ask for a seat outside or near a window for the best picture possible.
Go For Backgrounds
Choose a room with light walls and furnishings, and use a white or light background (like a piece of white paper, for example) for your photo. Using light accessories and props is also going to help achieve a brighter snap, so think about what you’re adding in to the frame too.
It doesn’t have to be a white background either – shake things up with pastel hues, marble tables or even tiles.
Minimise Shadows
Shadows can be a right nuisance when it comes to blog photography, but it is possible to minimise these. I try to take photos without blocking the light, so my body and camera don’t cast an odd shadow across my snap. I also recommend trying a few different angles as you go, just to ensure you’re getting the best light possible – this works well if you’re outside or on the move.
Another tip is to keep big items at the bottom and sides of the photo, so they don’t cast shadows on to any other props!
Edit Away
Once you’ve got the perfect snap, you can do a little editing afterwards to make sure you have the best photo possible. I always try to get my photo near perfect without editing, as brightening a photo can make it look over-exposed and dull, but a little editing can make a big difference.
Use levels or curves to increase the brightness, but don’t go overboard on this! Make sure any text or details can still be seen, washed out photos are not fun.
Practice makes perfect, keep snapping and you’ll soon see a difference!
Follow me on Instagram for pretty snaps.


